|
Projects
Processes
Power Tools
Resources |
Recipe for Making a Wine Bottle Coaster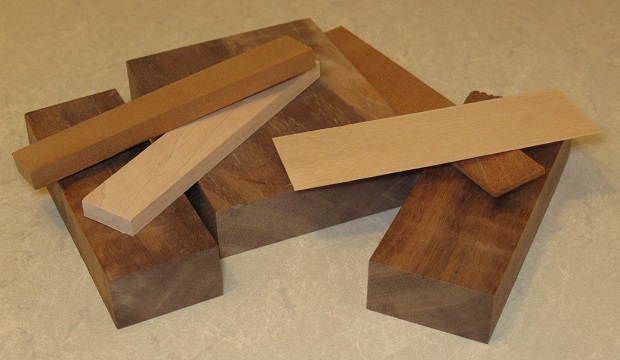 Gather Up the Wood BlanksBe
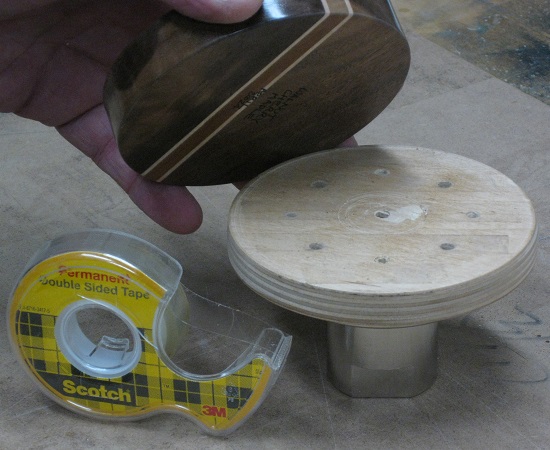
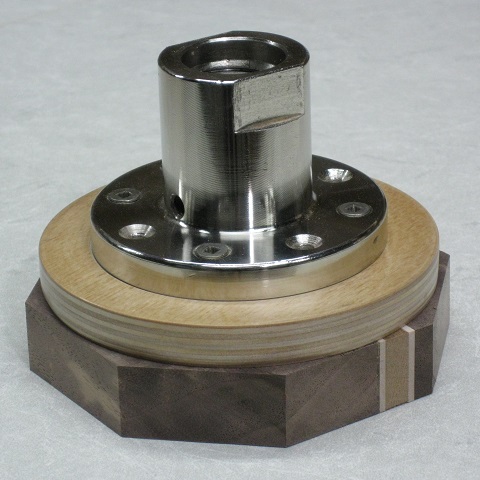 Mount the Blank by Screwing It to a FaceplateThe top of the coaster will be hollowed out. Therefore, we can drive screws into it as long as we keep them shallow. So, start by screwing the blank to a faceplate so that the bottom and outer edge can be turned. I have a three-inch diameter faceplate and I use a plywood disk to extend it to four inches for this project. Although there are eight screw holes, I find that four are enough to hold the blank. These screws pass through the faceplate and the plywood disk and penetrate only three sixteenths of an inch into the blank. This isn't much, but so far the blanks have stayed on the lathe during the jarring process of turning them round. Maybe I should make them deeper; after all, I'll be hollowing out the top face to a depth of about three-eighths of a inch. The pointy part of a screw is just to penetrate the wood and doesn't contribute holding power so I've ground it off. Also, I'm very careful not to over-tighten the screws. So, first I put the blank on the bench with what will be the top facing up. Then I carefully align the plywood disk on top of that and hold it firmly in place. I put a brad point drill bit into each of the four fixing holes and tap it with a small hammer to leave a mark. I remove the disk and enlarge the marks with a center punch. Then I drill at these marks (using my DIY drill press) being very careful about the depth. If I go too deep, the hole will show in the finished coaster. If the hole is too shallow, the screw will bottom out, strip the thread and not contribute holding power. Then I assemble the pieces as shown in the picture at right. The faceplate will screw directly onto the 1", 8 t.p.i. lathe headstock spindle. Rather than dealing with a square, I like to cut the corners off and start with an octagon. I do this after mounting the blank to the faceplate as there is more to hold onto as I slide it across the table saw bed. I have a jig to set the 45 degree angle and I set the position of the cut by eye. If you're happy to start with a square, then miss this step out and good luck.
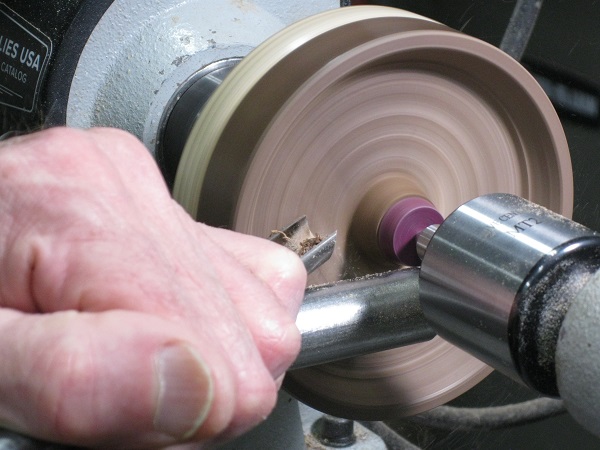
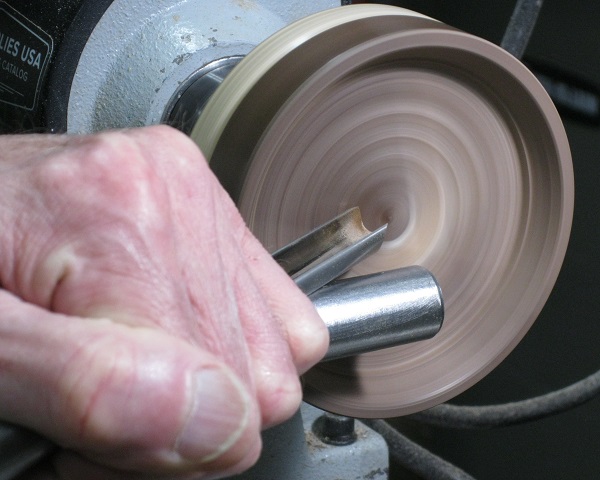
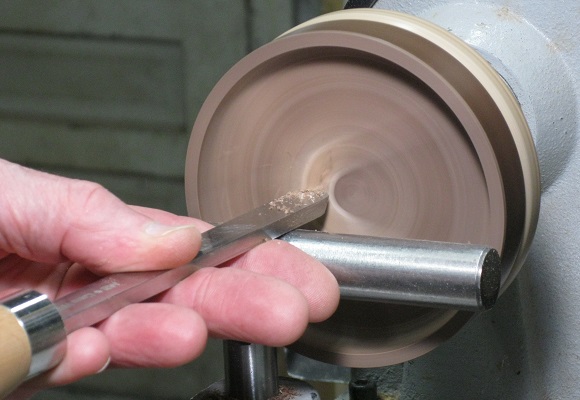
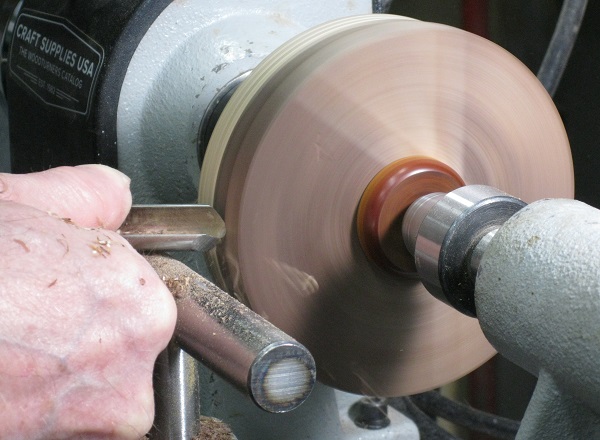 Turn the Blank RoundBecause the grain of the blank runs perpendicular to (across) the lathe axis, we're basically turning a bowl here, albeit a very flat, shallow bowl. Turning the outer edge is like turning the outside of the bowl, just very short with no curve. Use a bowl gouge, as shown in the photograph, to remove most of the material. I use push cuts from both sides towards the center, because that's the only cut I've mastered. If you can do pull cuts, or shear-scraping cuts, then fantastic, off you go. If I'm not getting a smooth finish (leopardwood, I'm looking at you) then I switch to a round-nose scraper. Of course, there's always sandpaper as a last resort. I confess that I find this "turning it round" process to be the most stressful and least enjoyable part of woodturning. At 500 r.p.m., the lathe speed I use at this time, starting from an octagon, the tool is slamming into the four-inch diameter workpiece sixty-seven times per second at six miles per hour. Are those four screws digging in by only three sixteenths of an inch going to hold it to the faceplate? So far, yes. But, I like to help with the tailstock (this is what it's for). As you can see in the photograph, I have a live center pressing on something that is, in turn, pressing the coaster blank against the faceplate. The something is a disk of very hard wood (cocobolo, if you must know) that was surplus from turning a bottle stopper. I don't know if this is strictly necessary, but it's easy enough, so I just do it. When the corners are all worked off and the coaster is close to round, I increase the lathe speed to 1,250 r.p.m. This allows for a better finish as well as faster progress. Before proceeding to the bottom face, I withdraw the tailstock support and make a mental note to tread lightly.
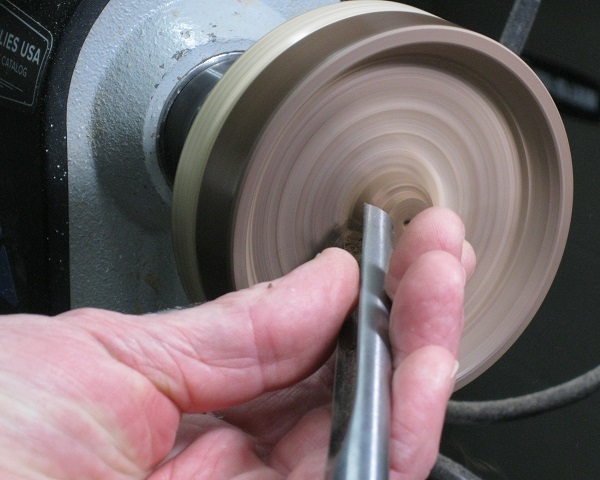
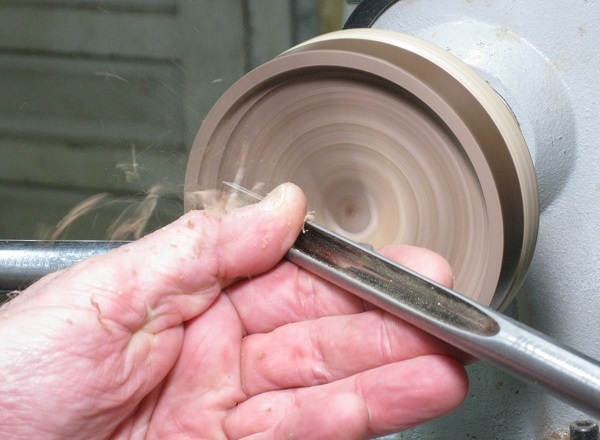
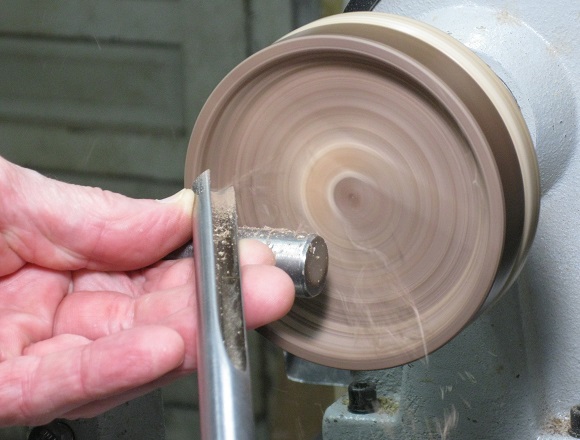
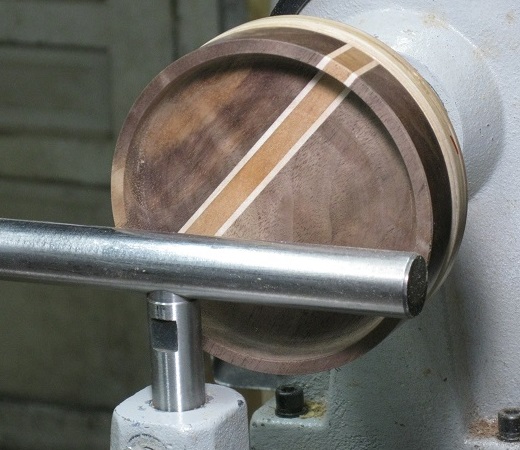
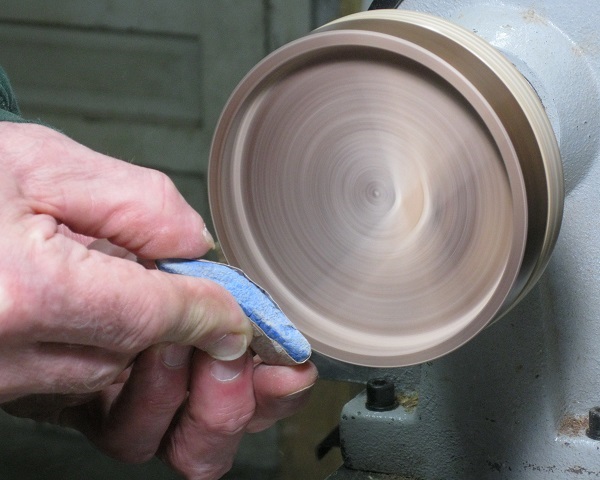
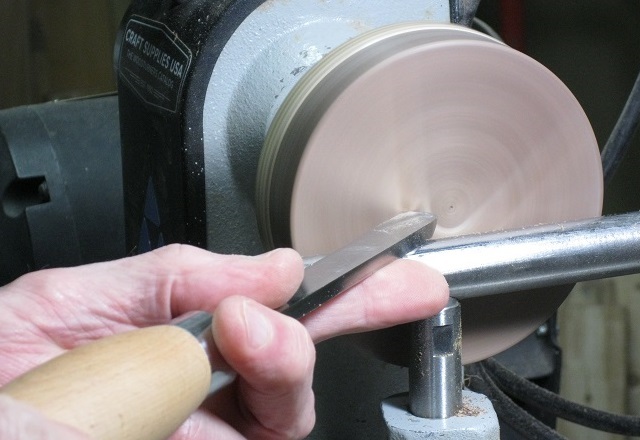 True Up the Bottom FaceIf you've taken reasonable care preparing the blank, the bottom of the coaster will be very close to flat and true. (If it isn't you'll need to use something more aggressive than what I describe here, such as a push cut with a bowl gouge, and lose some thickness.) With a good blank, my main concern is not to make it worse. So, I tend to go immediately for a nice sharp scraper. By holding the blade in my left hand, as shown in the photograph, and sliding my left index finger along the tool rest I can reliably make shallow straight cuts. I repeat this until I'm (very lightly) hitting the whole surface. It would probably be just fine to make the bottom flat. I try to make it very, very slightly concave. Should the wood change shape when it is hollowed out on the other side, this makes it less likely that you'll end up with a convex coaster that doesn't sit securely on the table. Although I try for a good surface finish overall, I should note than I'm later going to cover most of the coaster bottom with a cork mat, so I could actually tolerate something less than perfection except right at the outer rim. Round the Corner and Finish the Outside EdgeSharp edges are not a good idea on household artifacts so I "break" the right-angle between the bottom and the outside edge. To do this, I just bring the scraper carefully around the corner, aiming for a pleasing radius but without measuring anything. Now I have a chance to make any final improvements to the outside edge, dealing with rough spots left after turning to round. 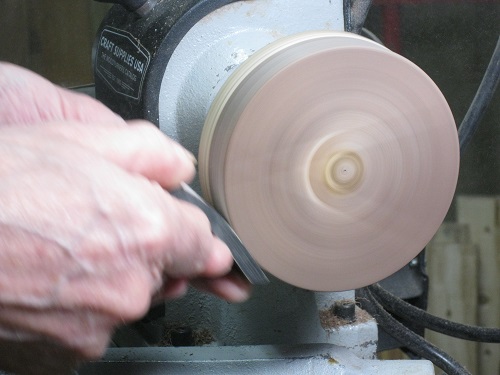 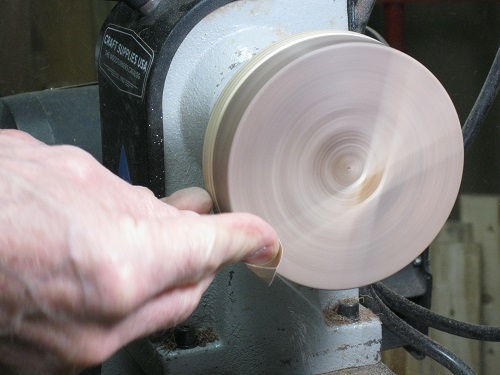 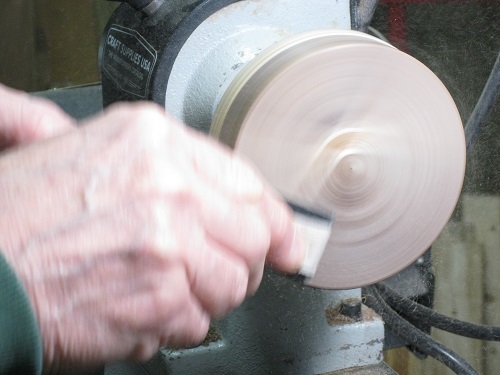 Sand the Bottom, Corner and EdgeHow much sanding you'll have to do depends on how good you are with the lathe tools and what wood you're working with.
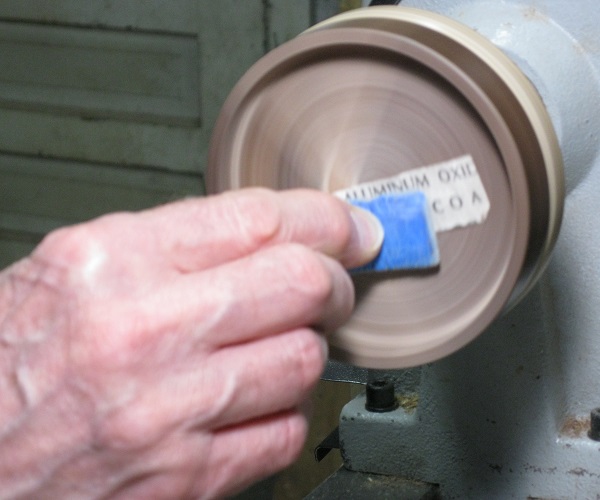
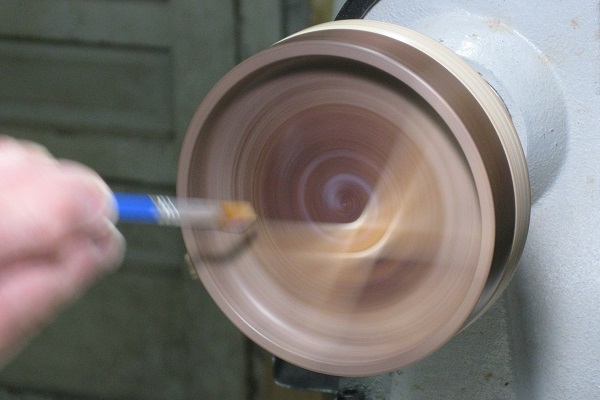
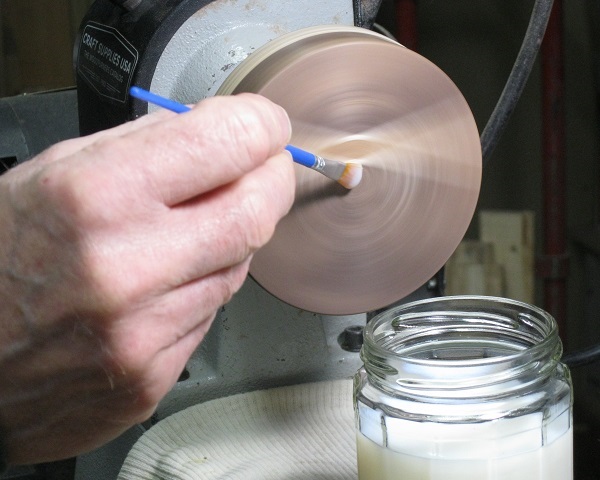 Apply Urethane Finish to the Bottom and EdgeI think it makes sense to apply the finish to the bottom at this point. Unless you work in zero gravity, you can't apply it to the whole coaster at once so you'll have to deal with a join. I cover the coaster bottom with a layer of self-adhesive cork, so I can hide the join under this. While I'm working on the bottom, I might as well bring the finish around the corner and up the edge. How this all works out will become clearer when I apply the finish to the top, below. The point of a wine bottle coaster is to catch drips and dribbles, so it has to tolerate getting wet. You also don't want to have to jump up from the table to wipe up every spill, so it has to stay wet until the end of the meal. Then it will get cleaned with a damp sponge and wiped dry. This rules out a lot of finishes and leaves urethane the clear favorite. The downside is that you lose the feel of wood. When you handle something finished with urethane, you know you're actually touching plastic. Oh, well. I use Minwax® Polycrylic™ water-based finish. The semi-gloss sheen is a good compromise between expectations of a water-resistant finish and allowing the character of the wood to show through. There is no darkening of the wood color and figure / chatoyance are properly emphasized. However, this and similar finishes are not easy to apply. You have to get the right amount on really quickly, smooth it out and then leave it alone. You can't go back to correct too-wet or dry patches. This will leave marks. Then you'll have to sand until the marks are gone and apply another layer. Also, applying too much results in sags and drips. The method I have developed uses the rotation of the lathe (at 500 r.p.m., the lowest speed) and takes advantage of the translucent white appearance of the finish before it drys. With the lathe spinning, I brush on finish starting at the center and working out until I can see, by the whitish bands, a slight excess. Then I stop the lathe and brush across the coaster from one side to the other. Then I rotate by a quarter turn and brush across again. This ensures I have finish everywhere across the face. Now I turn the lathe on again and hold the brush very lightly to the piece at the center and move it slowly out to the edge. The finish must still be wet and then the excess will be pushed ahead of the brush in a white band, leaving the right amount behind to dry up. I push the excess around the corner to the edge of the coaster. After spreading this out, I again stop the lathe and work quickly by hand to make sure that coverage is complete. If necessary, I dip up some more finish. Then the lathe goes back on and again I lightly apply the brush to chase any excess off the coaster. If I have too much finish, I may have to wipe the brush on a rag. Some may get onto the plywood disk, but that just means a little difficulty prying the coaster off when the finish is dry. When this is all done, I don't just walk away for fear that drips or sags will form. I periodically rotate the lathe by hand so that gravity pulls any excess finish in a different direction. I may decide to take the faceplate off the lathe and stand it up so that the coaster is flat. Only when the bright, wet look of the urethane gives way to a duller, dry look can I relax. I do this all three times (I told you it wasn't easy). The first coat seals the wood and raises the grain. The second coat builds up the finish. The third coat defines the final appearance and, to that end, must be perfectly flat. To help with this, I use a mixture of one part water to two parts finish. This gives me a little more time before it begins to dry and makes it more willing to flatten out. The first and second coats are more forgiving as you must sand with 320 grit to provide a key for the next coat. Small imperfections will disappear and, if necessary, you can step up the sanding to get rid of fairly serious mistakes, even to the point of sanding back to the wood. But try to get it right without such measures. You didn't become a woodworker to sand plastic.
 Re-mount the Blank to the Faceplate Using Double-Sided Adhesive TapeApply strips of tape to more-or-less cover the faceplate. I use “permanent” double side tape for no better reason than I have some on hand. You need thin tape, not the thick foam kind, so that the workpiece stays parallel to the faceplate. Make sure that the tape lies flat, without wrinkles or folds. OK, now you have to put the bottom of the coaster on the taped faceplate so that the workpiece runs true. I have a plywood disk that extends my faceplate to the same diameter as the coaster. In theory, I just line up the outer edge. However, this never quite works and I have to scootch the coaster this way and that until it is in the right place. If it does not run true, the most noticeable problem will be that the outer wall will not be the same thickness all the way round. I think I always get it right in fewer than ten tries, which is tolerable tedium. Once the workpiece is running true on the lathe, press it firmly onto the faceplate. Support the Blank Using the TailstockThe blank will be much more firmly held if it is pressed against the adhesive tape on the faceplate by the tailstock. However, just running up a plain live center won’t help much because the pressure will fall off as the point sinks in to the wood. If you have a live center with a cup point, that will do a better job, but it may prevent you from getting near the middle of the bowl. I use a “pressure disk” made of very hard wood in between the blank and a point center that has plenty of clearance. You can see it in the photograph below. I’m using a ⅝” diameter disk of purpleheart. This resists the point sinking in but can still benefit from tightening from time to time. I can get quite close to the middle of the bowl leaving just a small spigot.
 Begin Hollowing Out the TopUse push cuts just as if you were making a bowl (which you are, just a shallow, flat-bottomed one). The goal at this point is to remove as much wood as possible while you have tailstock support. You won’t be able to work close to the outside wall because the tailstock prevents you from swinging the tool handle. You won’t be able to get right into the middle because of the spigot where tailstock support is applied. Just take out the wood that you can, stopping just a bit short of the intended depth. I failed to take photographs of the early stages of hollowing and the one at right is faked so don’t look at it too closely. More wood has been removed near the outside wall than is actually possible with the tailstock in place. The spigot in the photograph is really a loose piece of scrap wood that I turned to the same shape. I had removed the spigot before I remembered the camera.
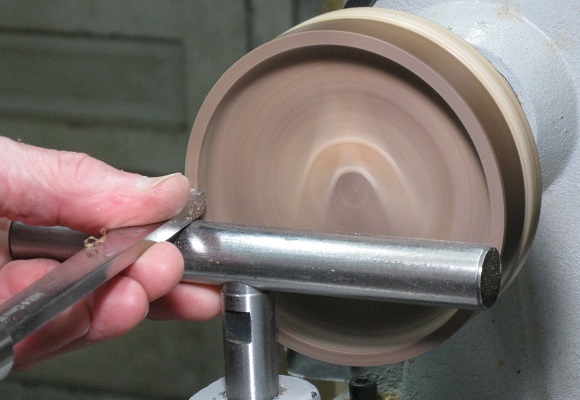
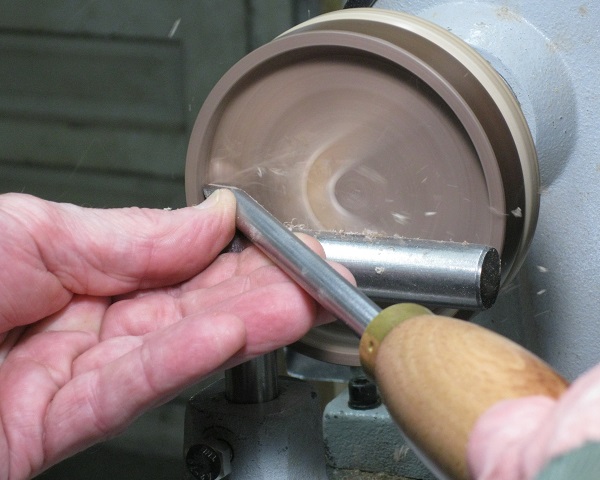
 Abandon Tailstock Support and Remove the SpigotWhen the initial hollowing has almost (but not quite) reached the intended depth of the coaster, the tailstock and spigot are blocking further progress. Withdraw the tailstock, perhaps removing it entirely from the lathe bed. Save the pressure disk to be reused. Remove the spigot using short push cuts along the cylindrical or conical surface, ending at the rough bottom face of the hollowed coaster. Pressure from the tool is then along the lathe axis, towards the headstock, and tends to hold the blank on the faceplate. Push cuts across the face of the spigot would apply a force tending to twist and shear the blank off of the faceplate. In the photograph, at right, my hand obscures the toolrest. It is positioned across the face of the workpiece, at right angles to the lathe axis, and my index finger is tucked alongside it.
  Continue Hollowing Out the TopWith the spigot out of the way, push cuts can be made all the way to the center. Because the tailstock is no longer pressing the blank against the faceplate, the attachment using double-sided tape is more tenuous, so take light cuts and avoid catches at all costs. It is also possible to make push cuts from the center towards the edge. There is a lot of material to remove here that the bowl gouge could not get to when the tailstock was in place. Again, take light cuts to keep the shear force on the faceplate bond small.
 Form the Inside Surface of the Outer WallUse short push cuts parallel to the lathe axis to form the inside surface of the wall of the coaster and establish the thickness of the rim. Stop before reaching the bottom of the hollow so that a pleasing curve can be cut in the corner using a scraper (see below). This cut presses the workpiece against the faceplate and should not risk detachment unless there is a catch. Use this in combination with push cuts across the bottom surface of the hollow (above) to remove the wood that you couldn't get to when using tailstock support.
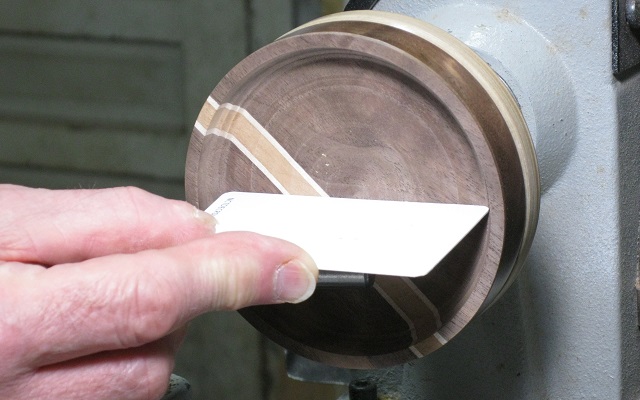 Check Flatness with a Credit CardUsually if something needs to be flat you lay a straight edge, such as a rule (ruler), across it in various directions. The inside bottom of the wine coaster’s “bowl” is less than four inches across, so we need a short strait edge. Most banking cards and ID cards conform to the ISO/IEC 7810 ID-1 format and are 85.6 mm on the longer side. This is 3.37” or about 3⅜” and is ideal for this application. You only need to lay the card edge on a diagonal. Deviations from flatness will appear equally on all diagonals. Strictly, this is only true if your turning cuts stay at the same depth for an entire rotation, but if they don’t you’re going to be aware of a bigger problem than flatness.
 Flatten the Rim of the CoasterCheck that the rim is running true and, if it isn’t, flatten it with a few passes of your scraper. Serious damage may require a bowl gouge. I’m ashamed to admit that this is often my situation as I have difficulty starting the final push cuts down the inside of the outer wall. The tip of the gouge skips outwards across the rim, leaving a spiral scar that I then have to remove.
 ScrapeMaybe your push cuts are so smooth and your bowl gouge is so sharp that you can proceed to sanding at this point. Mine are usually not. It’s been a big surprise to me, while learning to turn bowls, that scraping can produce a better surface finish that cutting. I’m starting to understand the attraction of “easy” lathe tools (carbide scrapers). At first, I turned my bowl gouge on its side and scraped with the wing. After a while, I bought a round nose scraper and ground it to a french curve.
  Scrape the Inside CornerYou may need to scrape the corner where the coaster rim meets the flat bottom either to improve the surface finish or to obtain a pleasing curve with a small radius. My skewchigouge is perfect for this when presented to the wood at a slightly negative rake angle. The radius of the tip is smaller than the curve I am trying for, so I move it in an arc around the corner and the cutting point sweeps around the cutting edge. It is very unlikely that you have a skewchigouge. You may be able to use a small spindle gouge in the same way or maybe you have a very small round-nose scraper. With enough skill, it may be possible to end your push cuts with a curved flourish that makes a nice inside corner. When you have hollowed out the top surface and obtained a flat bottom, vertical walls and a smooth curve between them (or whatever else you're trying for), the shaping is complete, you can put the tools away and move on to sanding and finishing.
  SandWhen the inside of the coaster is as true and flat as you can get with with a freshly sharpened scraper, it's time to sand. Look for the areas that have the worst surface finish and will therefore require the most work. On the inside of the rim there may be two areas, opposite each other, where the end-grain is rough or even torn. Begin sanding with a grit that will clean up these worst areas with reasonable effort. Don't reason that overall the finish is good and choose too high a grit on that basis. You will either spend too long on the bad areas or have to go back over them with a lower grit.
 Apply FinishThe bottom (which is taped to the faceplate) and the outer edge have already been given three coats of water-based urethane. Now it’s time to finish the top, including the inner edge and rim. To hide the junction of the new and previous finishes, one or more new coats can also be applied to the outer edge. The join will then be at the bottom corner where it is least visible. Follow the same process as described above. Remember that you’re now working on the side of the coaster that will be visible when it is on display. Don’t mess up at this late stage! (But if you do, you can sand back and repair just about anything.) If you find that the coaster has visible rings and looks like a tiny vinyl record, you have to figure out whether you added the rings by not smoothing out the finish or if the rings are turning marks that haven’t been sanded out. Or maybe even actual sanding marks. It is possible to make repairs at any level, but troublesome. When you are happy with the finish, carefully pry the coaster away from the faceplate. You may be surprised at how hard this is. Try sliding something like a wallpaper scraper in there. Don’t use a screwdriver. Using a tipping, levering action rather than a twisting action to avoid nicking the corner of the wood.
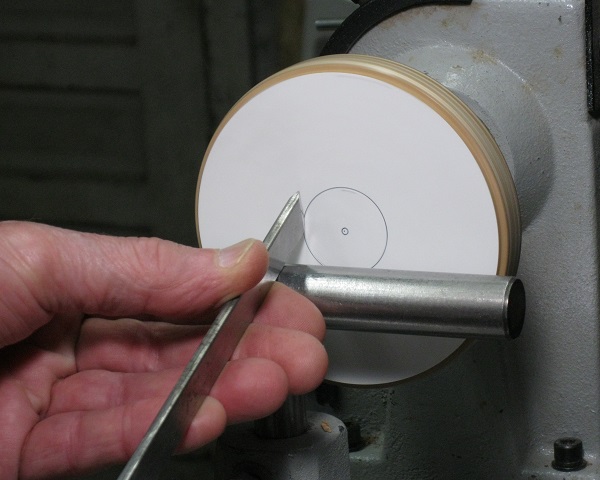 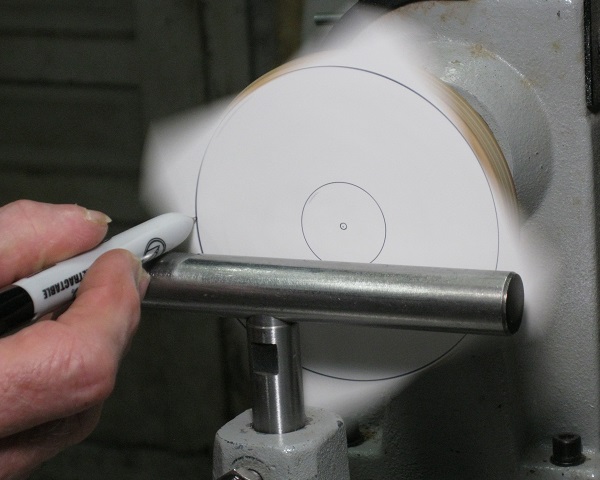 Cut the Adhesive Cork Disk for the Bottom of the CoasterIt seems to me that the coaster should have on the bottom some material that won’t mar whatever surface it is put on. Felt and cork spring to mind. I have in stock some Rockler Pressure Sensitive Cork Sheet, which I first bought for ordinary drink coasters. To give maximum support for a wine bottle, I use a disk almost the full diameter of the coaster. I cut a hole in the center inside which I can write the wood species and date of manufacture. The easiest way to make this disk is by sticking a four-inch square piece of cork sheet onto the faceplate in the same way as the coaster. The cork should be against the tape on the faceplate. Don’t press hard, then it will come back off cleanly. With the lathe on and using a fine point marker, touch the backing paper where you think the center is. The tiny circle will tell you where the center really is. Turn the lathe off and mark the radius to the hole (in my case a little over ½”) and the outer edge (1⅞”). Touch the marks and briefly spin the lathe to draw circles. Now cut at these circles with a skew chisel or some kind of knife. Discard the outer piece and the small disk from the middle and you have cork cut to fit the bottom of the coaster.
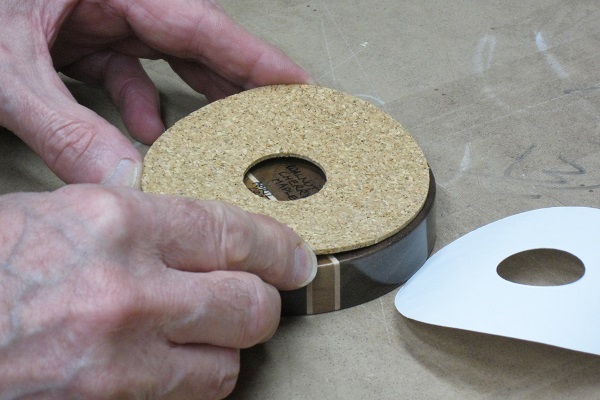 Apply Adhesive CorkPut the coaster upside-down on a clean work surface. Hold the cork disk by the edge and remove and discard the backing paper. Hover over the bottom of the coaster and adjust for an even space all around. If the cork touches, you’ll have to raise it up to unstick it and then try again. When you’ve satisfied with the position, lower it onto the coaster and press down where it has already touched. Then stroke outwards from this point to avoid air bubbles. You can make the cork sheet slide a very small distance as you do this to make a final adjustment. This is all a bit fiddly, but if you’ve got this far you can do it easily.
|