|
Network Storage
Introduction
TS-233 Basic Setup
Advanced Setup
Back to Wiki Home
edit this SideBar
|
So, what does the snapshot feature do? Consider the Windows Recycle Bin. When you delete a file, it disappears from wherever it was and shows up a special folder from which you can recover it if you change your mind. Now imagine that at some regular interval, maybe every day at midnight or every week on Sunday at 1:00 a.m., you got a new, fresh recycle bin. You can also decide at any time that this should happen, either in addition to or instead of the automatic, periodic new bin. The previous recycle bin, and others before it, don’t disappear, but stick around as well. Only when they get too old or there are too many of them do they get emptied (you get to decide what “too old” and “too many” mean). The storage space that they took up is then freed up for reuse. So, if you delete a file and later change your mind, you just go back to the recycle bin that was active when you deleted it and there it is, ready to be put back where it was.
What I’ve just described has no real advantage over the original recycle bin. But snapshots don’t only get back a file that you deleted and later wish you still hadn’t, they also get back an earlier version of a file that you edited. Normally, if you modify a file and then save it, the new version obliterates the previous one. Suppose that, instead, the previous version was moved to the recycle bin (but let’s start calling it a snapshot bin) and the new one took its place, but was written into fresh storage. Now, if you changed your mind about the modifications, or just wanted to look at a prior version of the file, you could browse back through the snapshot bins and find versions corresponding to the dates on which each bin became current. Suppose that you decide that all the changes to your files, both deletions and modifications, that have occurred since some date were a bad idea. You can work backwards through the snapshot bins, bringing back deleted files and older versions of modified files, until you reach that date. You’ve restored your entire set of data to the way it was on that date. (This is, for example, a defense against a ransomware attack).
One thing still needs to be clarified. If you modify and save a file multiple times in between snapshots (i.e. the arrival of a new snapshot bin), then only the first is treated as described above. You can only get back to how the file was at the moment of the snapshot. If you save a new version after the snapshot and then another version soon after that, then the first new one is really gone. The next version to appear in a snapshot will be the last one saved before the new snapshot is taken. (If this isn’t what you want, then you probably should be using a versioning file system.)
Configuring my Snapshot Settings
Although this paragraph is up here at the top, it’s not where I started on this topic. I started with “Puzzling Out what Snapshots Are ...”, way down below. I expected to figure out how this feature would best fit my needs and write down here how I made it work that way. What actually happened was that I decided its cost far outweighs its benefit, so I’m just documenting how I made darned sure it was turned off.
Pool Guaranteed Snapshot Space
- Storage & Snapshots → Storage → Storage/Snapshots, click on the top line (mine has the Name/Alias Storage Pool 1) and click the ‘Manage’ button near the top-right corner.
- The ‘Storage Pool 1 Management’ dialog appears. Click on ‘Action’ and in the menu that drops down select ‘Configure Pool Guaranteed Snapshot Space’.
- A dialog headed ‘Snapshot Settings’ appears, but has only one control, ‘Enable Pool Guaranteed Snapshot Space’. Make sure that this is off. (You can click the link to ‘What is pool guaranteed snapshot space’ to get an explanation which is better than the one repeated six times in the QTS User Guide.) Be aware that this does not on its own disable snapshots. They can still use the free space in the storage pool (User Guide, page 286).
- Click ‘OK’. A pop-up appears that has nothing to do with what you’ve just done. Click ‘OK’.
- Back at ‘Storage Pool 1 Management’, check that ‘Pool Guaranteed Snapshot Space’ (dark green) is 0.00% (0 MB). If Snapshot used (light blue outline) isn’t also 0.00% (0 MB), then you’ll have to figure out how to delete the snapshots. I didn’t have this problem. Click ‘Close’.
Schedule Snapshot (Do This For Each Volume)
- Storage & Snapshots → Storage → Storage/Snapshots, right-click anywhere on the line on which a volume appears (for example, Volume1) and in the menu that drops down select ‘Snapshot Manager’.
- The ‘Snapshot Manager’ dialog appears. The volume is shown near the top-left corner. Click the ‘Schedule Snapshot’ button. (I suppose that if ‘No Schedule’ appears under this button, you could skip all this, but I did it anyway.)
- The ‘Snapshot Settings’ dialog appears. The volume is not shown. In spite of this, the settings apply only to the volume you selected to get here. You need to do this for each volume. On the ‘Schedule Snapshot’ page, make sure that ‘Enable schedule’ is off.
- Click on ‘Snapshot Retention’. There are three options here. You can’t select ‘Maximum amount of time to keep’ or ‘Maximum number of snapshots to keep’ unless you specify a non-zero amount of time or number. For ‘Smart Versioning’, you have to have specify a non-zero number of hourly, daily, weekly and monthly snapshots. I close to select ‘Maximum amount of time ...’ and set it to one minute. Click ‘OK’.
- A ‘Caution’ pop-up appears, warning that the new policy will be applied to existing snapshots. So, a minute from when I click ‘OK’ here, all snapshots on this volume will be deleted. What luck! I was wondering how to do that.
- There is a ‘Pool Guaranteed Snapshot Space’ page on the ‘Snapshot Settings’ dialog. (There is also a grey ‘Pool Guaranteed Snapshot Space’ button in the ‘Snapshot Manager’ dialog.) This does not mean that you can configure that parameter independently for each volume.
Snapshot Global Settings
- Storage & Snapshots. Click the cog icon at top-right (it has the tool tip ‘Global Settings’). The ‘Global Settings’ pane slides in from the right.
- Click on ‘Snapshot’. The ‘Configure settings for all snapshots on the NAS’ GUI element appears.
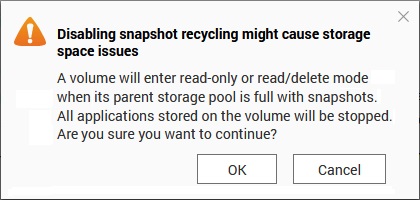
- Turn off ‘Smart Snapshot Space Management’. A warning pop-up appears stating the dire consequences of the storage pool filling up with snapshots (see screen capture, at right). To me, this is a good reason not to have snapshots. There is no risk if there are no snapshots.
- In ‘snapshot Directory’, Turn off ‘Enable File station Snapshot Directory for administrators’. I don’t know what it is, but it’s surely of no use without snapshots.
- Also here, Turn off ‘Make snapshot directory (@recently snapshot) visible in shared folder root’. (In retrospect, it was the appearance of this folder in each shared folder, as I created it, that made me think that this feature was turned on and it was imperative that I figure it out before deploying the NAS.)
- The remaining settings don’t sound important, so click ‘Apply’.
Puzzling Out what Snapshots Are in the First Place
One source of my impression that snapshots would eat up storage space was the ‘Detailed Comparison’ pop-up that you can call up from the ‘Volume Creation Wizard’. Here the features of the different volume types are tabulated. ‘Snapshots’ appears under ‘Thick volume’ as “Yes (Large space required)”.
Throughout the setup process, QTS pestered me to set options related to ‘Snapshots’. It was far from clear to me (at that time) what snapshots are and what would be the implications of using this feature in my rather simple, domestic situation. So, I put this off until it was delaying final deployment. I gained the impression that snapshots involve periodically creating records of the data in all or part of the NAS storage (pools, folders or volumes). Surely this would take up a lot of space, more and more as time passed? How would space be released? What would happen if free space ran out? How much effort would I have to spend dealing with this? Would the ability to recover deleted and changed files be worth it all? How could I be sure it’s all turned off?
A breakthrough occurred when I re-watched a video on the YouTube channel ‘QNAP UK’ entitled SNAPSHOTS Explained in Under 10 Minutes. Some of this is the usual pointing at things on the screen and droning on without actually explaining them. But the following flashes of insight were invaluable to me.
- 0:48 : “You can see I’ve only got snapshots enabled on the data volume ...”. So, you can enable / disable snapshots on a volume-by-volume basis. (The presenter doesn’t explain how, but I’m sure I can figure it out.)
- 0:56 : “I take a snapshot every 12 hours ... and keep them for a maximum of two weeks”. That’s 28 snapshots. (Again, I’ll figure out how this is configured).
- 1:16 : “But the main thing ... I’ve got 6.74 TB ... and I’ve got 24 snapshots of that ... if I look at the main storage pool where the snapshots live, I’ve got a pool guaranteed snapshot space there of 5% ... 743 GB ... I’m only using 0.14% of that, which is just over 20 gigs ...”. Clearly, I don’t understand what is going on. Maybe I should enable this feature, if only to gain mastery of it. I have about 3½% of my storage pool unallocated. Maybe I should make this my pool guaranteed snapshot space? It’s twenty times what the presenter has.
- 2:20 : “A snapshot ... contains just the data that is being modified or deleted ... new file isn’t stored in the snapshot”. Ahah! This is why the storage requirement is so small. Light begins to dawn.
- 2:58 : “... so its a block-level protection ... rather than a file-based ...”. This statement is in no way justified by what went before. More work is needed if I want to understand this. Ignore it for now.
- 3:40 : “If every couple of months, I ... delete a few hundred gigs then my snapshot is going to get bigger while that two-week process is going on”. This is a bungled explanation, but I think get the point. The storage space associated with the deleted data is not freed, as one might expect, but is set aside to become part of a snapshot. Later snapshots do not further increase the storage used ;;for that mass deletion event;;, only for subsequent changes and deletions. Space from deleted files will be released when snapshots age out and are removed from the system.
- 4:02 : “So you don’t need a lot of space allocated to the snapshot reserved space”. The phrase “snapshot reserved space” does not occur in the QTS User Guide. I think he means “pool guaranteed snapshot space”. If so, point taken.
- 4:58 : “Snapshot reserved space is ... just a place that the storage pool reserves for snapshots that a volume can never use ... guaranteeing that you’re always going to have some free capacity in your storage pool so that snapshots can be successful.” This suggests that pool guaranteed snapshot space is only useful if volumes could take up all (or too much) of the space in the pool. This is not the case if all of my volumes are thick volumes and I keep their size (capacity) under control. The space I don’t assign to volumes will always be available, so I don’t need pool guaranteed snapshot space. I think.
- From the video description : “QNAP developed ... snapshot technology that stores changed data "outside of the volume”. This fits in with what I’ve learned. Volumes are the things that snapshots apply to and in order for them to work there must be space available (in the storage pool) that isn’t in use by a volume.
|